Wednesday, April 23, 2008
Cat in Flowers
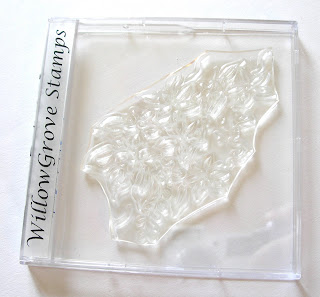
Willow is an inside cat but if she had it her way she would be spending her time hiding in the flowers in my garden. What a bright and cheerful card to celebrate Spring! Don't forget to add extra goodies from Creative Cafe at Lasting Impressions. Cat in Flowers stamp will be available soon in the mini calendar cases.
Tuesday, April 22, 2008
You Found the Pumpkin! Congratulations!!!!
Visit our website for WillowGrove Stamps for more great card ideas!
Have you seen our Haunted House Halloween Stamp Set?
Coming Soon!!!! Keep checking back to see our new line of Christmas Stamps!
Santa says there will even be a Christmas Giraffe!
Have you seen our Haunted House Halloween Stamp Set?
Coming Soon!!!! Keep checking back to see our new line of Christmas Stamps!
Santa says there will even be a Christmas Giraffe!
Friday, April 18, 2008
WillowGrove's New Look!
I love storing my clear stamps in calendar cases so I looked into finding mini calendar cases to create a home for the 3 x 4 stamps. I am very excited to announce that WillowGrove Stamps will now be using mini calendar cases for packaging. I often found that the clear bags would tear easily and trying to place the stamp back into the bag after I used it was sometimes difficult. The calendar cases are easy to stack and they are reuseable! Plus they are the cutest little things. In the next few weeks Lasting Impressions is going to redo the WillowGrove wall to focus on the new mini calendar cases. It is now Springtime and we are ready for a whole new look!
Sunday, April 13, 2008
Inside Out Card
I decided to do something different when I made John's birthday card. I decided to leave the outside of the card plain and decorate the inside of the card. I call it my Inside Out Card.
I used many layers of Alcohol ink on white shiny Kromekote paper. I couldn't leave the Cuttlebug out of this project so I used the Birthday template on my decorated paper.
Don't be afraid to combine WillowGrove stamps. I coloured the heart and flowers with Tombow markers. Tombow markers take longer to dry on Kromekote paper so this allowed me to pour Goddess Gold Embossing Powder (clear powder with gold sprinkles and yes, you can find this at Lasting Impressions) and emboss! This technique adds texture and allows the images to 'pop'.
The last step was to write John a Happy Birthday message. I used a black permanent ink pen which worked well on the shiny paper. But I'll keep my message a secret! :)
Wednesday, April 9, 2008
Happy Birthday, John!
Don't forget to use your WillowGrove stamps for projects other than cardmaking. This is a fun bucket I decorated to wrap a gift for my husband John. As many of you know, he works at Cameron Paint so I thought a Paint Can theme would be more fun than wrapping his gift in ordinary wrapping paper. I created a custom stamp of John and used that as my main image.
Don't miss out on Beth's Cuttlebug class this Saturday at Lasting Impressions for more ideas on decorating cans. They are perfect for holding candy (Yes, I did think of putting candy instead of a gift in this bucket but I was afraid I would eat it before John's birthday so I opted for a regular gift instead) or special gift items.
Wednesday, April 2, 2008
Transparency Fun!
Transparencies are a lot of fun to incorporate onto your cards. I applied Alcohol ink to Kromekote and ran it through the Cuttlebug. This is a great way to create your very own one-of-a-kind paper. Next, I used black Staz-On ink and stamped Fabulous Flower onto a transparency. I wanted the flower to "Pop" so I stamped it again on plain white cardstock using black dye ink. I coloured the flower with Tombow markers, cut it out and glued it behind the transparency flower. I added a sparkley "bobble" from my stash of goodies. Of course, the last step was to add Burgundy Stickles!
This Saturday I will be teaching different techniques using transparencies to the Stamp Club at Lasting Impressions.
Subscribe to:
Posts (Atom)